When summer heat strikes or stuffy rooms need circulation, installing a fan can be a game-changer for your home comfort. The good news is that many fan installations are perfectly manageable for weekend warriors with basic tools and a bit of confidence. Better yet, these projects don’t need to drain your savings. This guide walks you through several fan installation options that combine practicality with affordability, helping you beat the heat without breaking the bank.
Understanding Your Fan Options
Before diving into installation, it’s worth surveying the landscape of available fan types. Each comes with distinct benefits, installation requirements, and price points:
Ceiling fans offer excellent whole-room circulation and can become attractive fixtures in your space. These typically require more installation effort but deliver long-term value.
Wall-mounted fans save floor and ceiling space while providing directed airflow. They’re ideal for rooms with limited space or as supplements to central cooling.
Window fans excel at bringing in fresh air or exhausting stale air and require minimal installation.
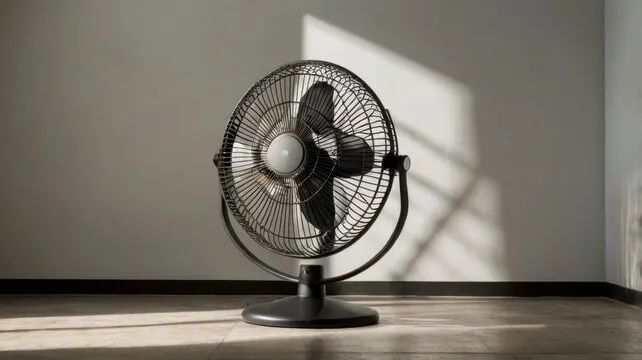
Portable fans from HunterFan provide ultimate flexibility with no installation required, allowing you to move cooling power wherever it’s needed most. These can be an excellent starting point for homeowners not yet ready for permanent installations.
Ceiling Fan Installation: Easier Than You Think
Ceiling fans intimidate many homeowners, but with proper preparation, they’re quite manageable as DIY projects. Here’s how to approach it:
Preparation is Key
First, ensure you have a proper electrical box rated for ceiling fans. Most light fixture boxes cannot support the weight and motion of a fan. Look for boxes specifically labeled for ceiling fan support, capable of holding at least 50 pounds.
Before touching any wiring, always turn off power at the circuit breaker—not just the switch. Verify power is off using a non-contact voltage tester before proceeding.
Assembly and Mounting
Most ceiling fans come partially disassembled. Follow the manufacturer’s instructions to attach the downrod, connect the wiring, and mount the fan body. Here’s a streamlined approach:
Install the mounting bracket to your ceiling electrical box. Assemble the fan body, downrod, and canopy on the floor where you have space to work. Connect wiring following color codes (typically black to black, white to white, and green or bare copper to ground). Carefully lift the assembled fan and attach it to the mounting bracket. Secure all connections and attach the fan blades last to make handling easier.
The total cost typically ranges from $75-200 for a quality ceiling fan, plus minimal costs for any additional mounting hardware you might need.
Wall-Mounted Fans: Circulation Where You Need It
Wall-mounted fans offer excellent directional airflow without consuming floor space. They’re particularly valuable in workshops, kitchens, or small bedrooms.
Installation Basics
Most wall-mounted fans come with paper templates to mark screw locations. The key is finding solid mounting points—either studs or appropriate wall anchors rated for the fan’s weight and motion. For most models:
Locate wall studs using a stud finder or test the wall by tapping. Mark mounting bracket locations, ensuring the fan will have proper clearance. Pre-drill holes for mounting screws. Attach the mounting bracket securely. Connect the fan to the bracket according to manufacturer instructions.
For oscillating models, ensure enough clearance for the full range of motion. Most wall-mounted fans cost between $30-100, making them an affordable option for directed airflow.
Window Fan Installation: Maximum Benefit with Minimal Effort
Window fans are among the easiest to install while providing excellent ventilation. They can either draw fresh air in or expel stale air out, with some models capable of doing both simultaneously.
Quick Installation Process
Most window fans are designed to expand and fit securely within standard window frames:
Measure your window opening to ensure the fan will fit. With the window open, place the fan on the sill. Extend the side panels to fill gaps. Close the window sash down onto the top of the fan to secure it. Some models include additional foam seals or securing methods—follow the included instructions.
Window fans typically cost between $25-60, making them one of the most budget-friendly options for significant airflow improvement.
Smart Upgrades for Existing Fans
If you already have fans installed, consider these affordable upgrades to enhance their performance:
Remote Controls and Smart Switches
Adding remote capability to existing ceiling fans can cost as little as $20-40 for a universal remote kit. For the more tech-savvy, smart switches compatible with home automation systems typically range from $40-60 but add tremendous convenience and can even help reduce energy costs through scheduled operation.
Installation usually involves:
- Turning off power at the breaker
- Removing the existing switch plate
- Replacing the standard switch with the smart controller
- Setting up the corresponding app or remote
Blade Cleaning and Balancing
An often overlooked “installation” is simply maintaining your existing fans. Dust accumulation can reduce efficiency by up to 30%. A thorough cleaning and blade balancing kit (usually under $10) can make an old fan perform like new.
Attic and Whole-House Fan Options
For those willing to take on a slightly bigger project, whole-house fans can transform your home cooling approach. These powerful fans, installed in hallway ceilings or attic spaces, can cool an entire house quickly during evenings by drawing in cool outside air and forcing hot air out through attic vents.
While professional installation is recommended for cutting ceiling openings, the electrical connections follow similar principles to ceiling fan installation. Costs range from $300-700 for the fan unit itself, making this a more significant investment that typically pays off through reduced air conditioning use.
Safety First: Electrical Considerations
Whatever fan installation you choose, electrical safety should be your priority:
Always turn off circuit breakers before working with wiring. Use appropriate wire connectors and electrical tape to secure connections. Follow manufacturer specifications for circuit requirements to ensure proper operation. Don’t overload circuits with multiple high-draw appliances, which can trip breakers or create hazards. Consider consulting an electrician if you’re uncomfortable with any aspect of electrical work—safety should never be compromised for savings.
Making Your Selection
When choosing which fan installation to tackle, consider:
When choosing which fan installation to tackle, consider your comfort level with tools and electrical work. Think about the permanence you desire—whether you want something installed for years or the flexibility to move it as needed. Evaluate the primary purpose of your fan, whether it’s for whole room cooling, directed airflow, or ventilation. Finally, be realistic about your budget constraints and which option gives you the best value for your specific situation.
Remember that proper air circulation does more than provide comfort—it can reduce air conditioning costs, prevent mold growth, and improve indoor air quality throughout your home.
With the right approach and reasonable expectations, installing a fan is an achievable weekend project that delivers immediate benefits to your home comfort. Whether you opt for the simplicity of a window installation or the permanence of a ceiling fixture, your effort will be rewarded with better air circulation and potential energy savings for years to come.