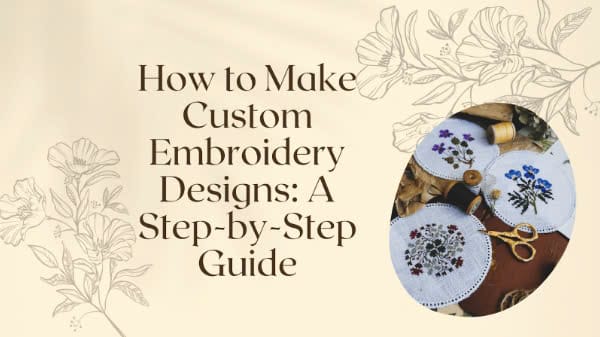
Have you ever wanted to create your own custom embroidery designs but didn’t know where to start?
The good news is that embroidery isn’t as complicated as it looks. With the right steps, you can turn any idea into a stitched masterpiece.
In this guide, you’ll learn everything you need to create high-quality embroidery designs, from planning and digitizing to testing and perfecting. No matter your skill level, you’ll find practical steps to help you get started and improve along the way. Ready to bring your designs to life? Let’s dive in.
Contents
Why Custom Embroidery Designs?
Customization and Creativity
Designs come to life with custom embroidery. You can create something unique to your style, brand, or message rather than using the same patterns that everybody else might be using. A customized embroidery service, whether monogram, logo or original pattern, offers you complete creative control.
A Professional Touch
Custom embroidery gives uniforms, hats, and promotional items a professional, high-quality look. With custom print on demand with PrintKK, brands can offer embroidered products without holding inventory. A well-stitched logo strengthens brand identity and helps businesses appear more established and trustworthy.
A Special and Meaningful Gift
If you’ve ever wanted to give a unique gift to someone? Custom embroidery is a way to personalize something, from a name on a baby’s blanket to a special date on a handkerchief. Homemade, embroidered items are sometimes keepsakes as they may have some sentimental value.
Better Quality and Longevity
Embroidery has a longer lifespan than printed designs. It does not fade or peel as time goes on. These qualities make it a great fabric for clothes and accessories that will undergo a lot of washing and wear.
A Skill That Lasts a Lifetime
Designing your own embroidery designs is still a useful skill to have. Once you understand the basics you can spend the rest of your life honing your technique, trying different stitches and even starting your own embroidery projects or business.
Custom embroidery is more than simple decoration — it is about creating something which has an impact but also lasts and means something.

How to Make Custom Embroidery Designs: Step-by-Step
1. Plan and Prepare Your Design
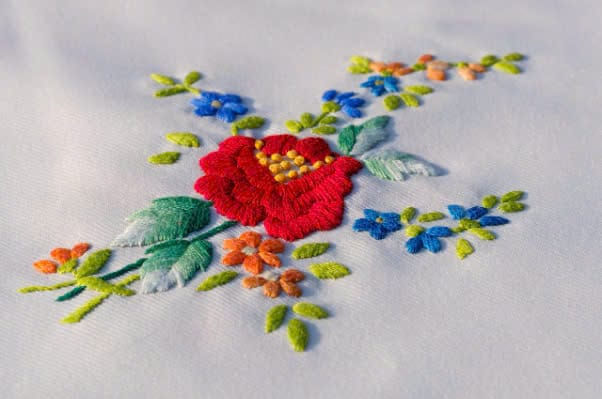
Before you begin, have a clear idea of your design. Think about its purpose—are you creating a logo, a decorative pattern, or a personalized monogram? Simpler designs work best, especially if you’re new to embroidery. Too many small details or thin lines may not stitch well, as embroidery threads have limits in precision
Consider the size of your design based on the fabric and placement. A large design on a delicate fabric might cause distortion, while a highly detailed image shrunk too small may lose clarity. Sketch your idea on paper or use a graphic design tool to visualize it before moving forward.
2. Convert the Design for Embroidery
Unlike printing, embroidery requires a special file format that tells the machine where and how to stitch. This process is called digitizing. You can use software like Wilcom, Hatch, or Ink/Stitch to convert your design into a machine-readable format.
When digitizing, you must consider:
- Stitch Type: Satin stitches work well for letters and outlines, while fill stitches cover larger areas.
- Stitch Density: Too many stitches can make the fabric stiff, while too few may result in gaps.
- Stitch Direction: Aligning stitches with the natural flow of the design improves durability and appearance.
If you’re new to digitizing, consider using a professional digitizing service to ensure a clean result.
3. Prepare the Fabric and Hoop Correctly
Before stitching, the fabric must be properly stabilized. Embroidery can cause fabric to stretch or shift, leading to misaligned designs. A stabilizer helps keep the fabric firm during stitching. There are different types:
- Cut-away stabilizers provide long-term support and work best for stretchy fabrics.
- Tear-away stabilizers are easier to remove and are good for firmer materials.
- Water-soluble stabilizers are useful for delicate fabrics or designs that need a clean finish.
Once you choose the right stabilizer, hoop your fabric tightly. Make sure there are no wrinkles, as even slight distortions can affect the final design.
4. Test Before Final Stitching
Never stitch directly onto your final fabric without testing first. Load the design into your embroidery machine and run a test on a similar fabric. This will help you check:
- Thread tension – If it’s too tight, stitches may pucker the fabric. If too loose, they may look uneven.
- Design accuracy – Make sure all details appear clearly and as expected.
- Color choices – Sometimes, the thread may look different on fabric compared to the digital preview.
Making small adjustments now can prevent wasted materials and frustration later.
5. Finish and Clean the Design
Once the stitching is complete, remove the fabric from the hoop carefully. Trim any excess threads, and if you use a stabilizer, remove it based on its type. Some stabilizers peel off, while others dissolve in water.
To give the design a polished look, lightly press the embroidered area with an iron. Avoid direct heat on the stitches—use a pressing cloth to prevent flattening the embroidery.
Tips for Perfect Custom Embroidery Designs
Choose the Right Fabric
Not all fabrics work well for embroidery. Thick, stable fabrics like cotton, denim, and canvas hold stitches better than delicate or stretchy materials. If you’re working with soft or thin fabric, use a stabilizer to prevent puckering. Testing your design on a scrap piece first can help you see how the fabric reacts.
Keep Your Design Simple
Embroidery machines work best with bold, clear designs. Small text and very thin lines can be difficult to stitch neatly. If your design has a lot of details, consider simplifying it. Too many stitches packed into a small space can make the fabric stiff and uneven.
Use the Right Stitch Type
Different stitch types create different effects. Satin stitches work well for letters and outlines, while fill stitches cover large areas. Running stitches are best for fine details but may not be as durable. Understanding how each stitch works will help you choose the best option for your design.
Order a Sample
If you are working with a print-on-demand embroidery service, always order a sample before selling or distributing your product. This helps you check the stitching quality, colors, and fabric feel. A sample ensures that your final product meets expectations before it reaches customers.
Conclusion
Creating custom embroidery designs is about turning ideas into reality. Whether for a brand, a unique gift, or an online business, embroidery helps designs stand out.
For print-on-demand embroidery, quality control matters. Ordering samples, testing designs, and ensuring durability can improve customer satisfaction. Done right, embroidery adds value and strengthens brand identity.
Now, take what you’ve learned and start creating. Adjust, refine, and explore new ideas. Whether for yourself or the market, embroidery lets you make something truly unique—one stitch at a time.